
Circuit Diagrams 1. Have a look at your Workbook (activities 1 and 2).
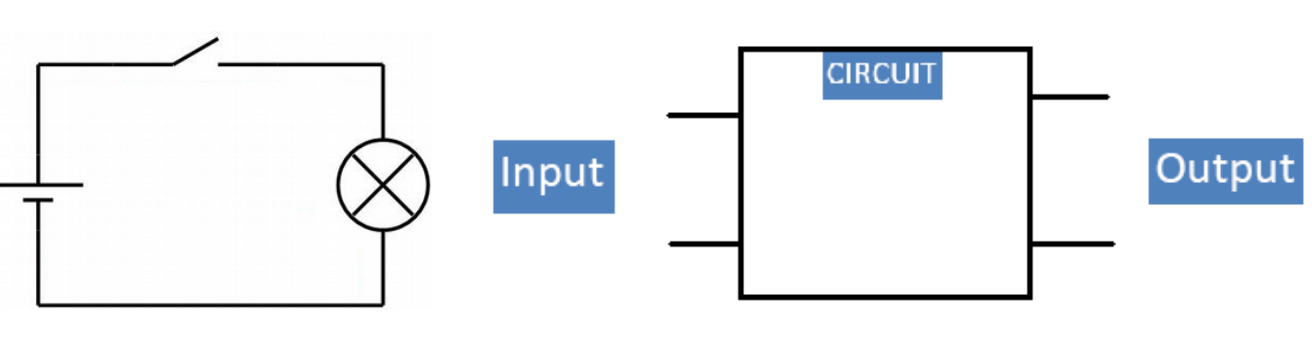
Activity 1: Paper Activity 22. Have a look at the circuit and identify the 3 elements (Input-Process-Output). Follow the instructions below:
- Download the picture to Descargas. From the online tool above click on the image icon to upload the picture. Enlarge its size (make it bigger) and place it.
- After that have a look at the circuit and...
- Input: what we want (to turn ON and OFF the lamp)
- Output: what we get (the lamp lights up or the lamp doesn't light up)
- Process: the medium through which we get what we want (the medium between input and output)
- Draw the circuit. Notice you have 2 lines (wires) at the input and another two at the output.
- Write your group name and group on the electric circuit.
- When finished download the picture (Export page as PNG) to Descargas (change its name by circuit8.png) . Call the teacher. Finally, upload the picture to your Classroom/unit4_2/Electronic_Circuits.
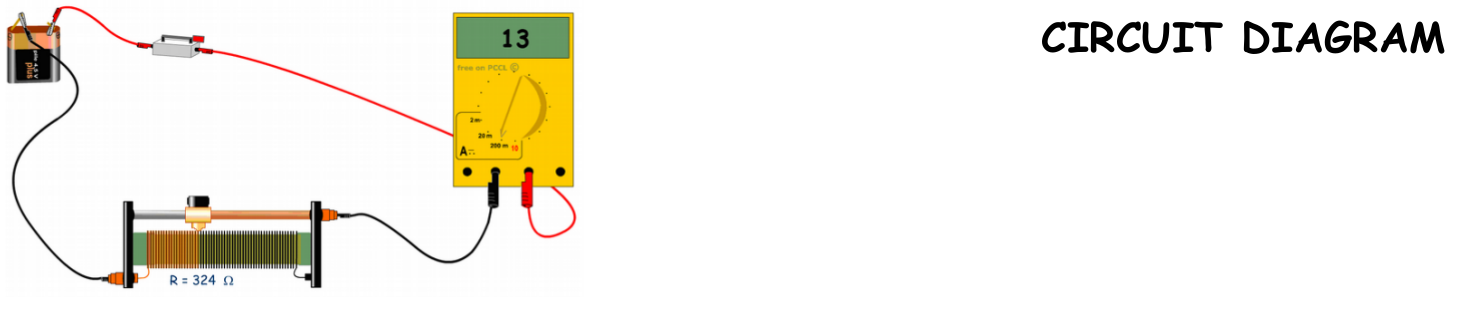
Activity 2: Paper Activity 23. Have a look at the circuit and draw its Circuit Diagram. Follow the instructions below:
- Download the picture to Descargas. From the online tool above click on the image icon to upload the picture. Enlarge its size (make it bigger) and place it.
- Notice how the circuit is wired and draw the circuit diagram including an ammeter.
- Write your group name and group on the electric circuit. When finished download the picture (Export page as PNG) to Descargas (change its name by circuit9.png) . Call the teacher. Finally, upload the picture to your Classroom/unit4_2/Electronic_Circuits.

Circuit Diagrams 2. Have a look at your Workbook (activities 3 and 4).
Activity 3: Paper Activity 24. Have a look at the circuit diagram and draw the electric circuit. Follow the instructions below:
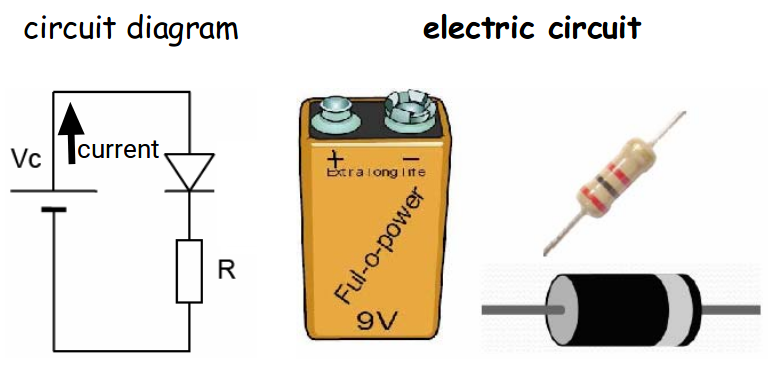
Now you are going to complete the electric circuit of the circuit below taking into account its circuit diagram (with symbols). Follow these instructions:
- Download the picture to Descargas. From the online tool below click on the image icon to upload the picture. Enlarge its size (make it bigger) and place it.
- Notice how the circuit diagram is wired and complete the electric circuit with wires (red lines).
- Write your group name and group on the electric circuit. When finished download the picture (Export page as PNG) to Descargas (change its name by diode1.png) . Call the teacher. Finally, upload the picture to your Classroom/unit4_2/Electronic_Circuits.
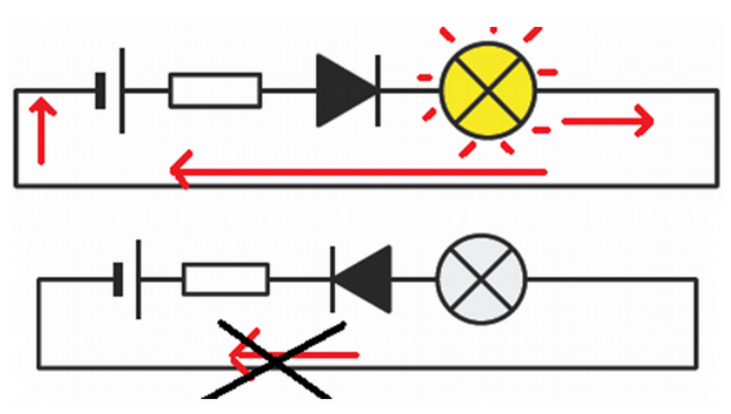
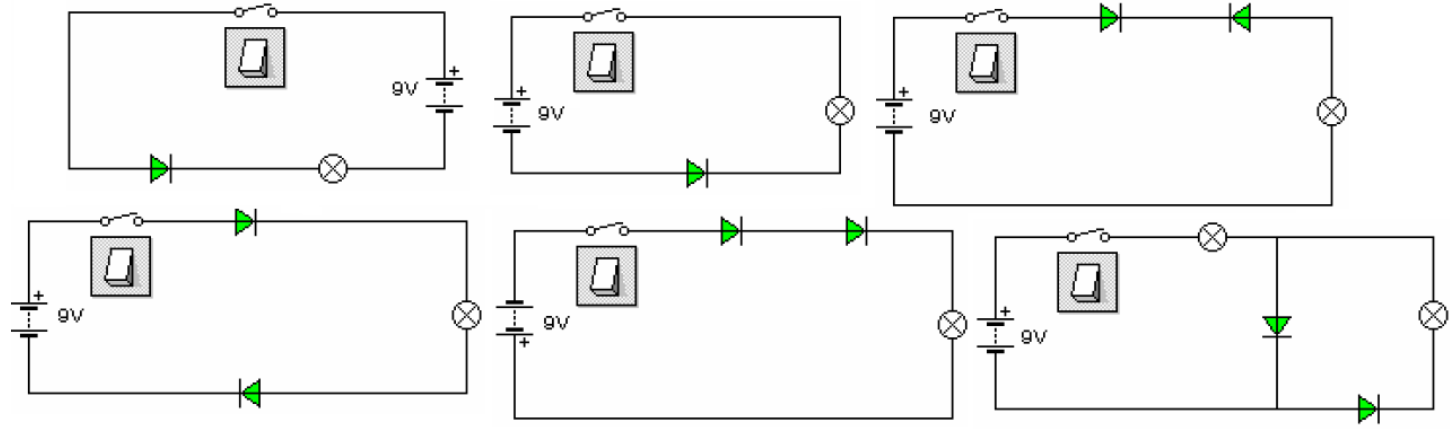
Activity 4: Paper Activity 24. Have a look at the picture below and notice how current flows in a circuit with diodes.
- Use the same tool above
- Download the picture to Descargas. From the online tool above click on the image icon to upload the picture. Enlarge its size (make it bigger) and place it.
- Draw the current (with red arrows) in the 6 circuits when it exists (through the battery and the diodes) and indicate if the lamp is lighting up. If there is no current draw a red cross on the line.
- Write your group name and group on the electric circuit. When finished download the picture (Export page as PNG) to Descargas (change its name by diode2.png) . Call the teacher. Finally, upload the picture to your Classroom/unit4_2/Electronic_Circuits.
Microcontrollers
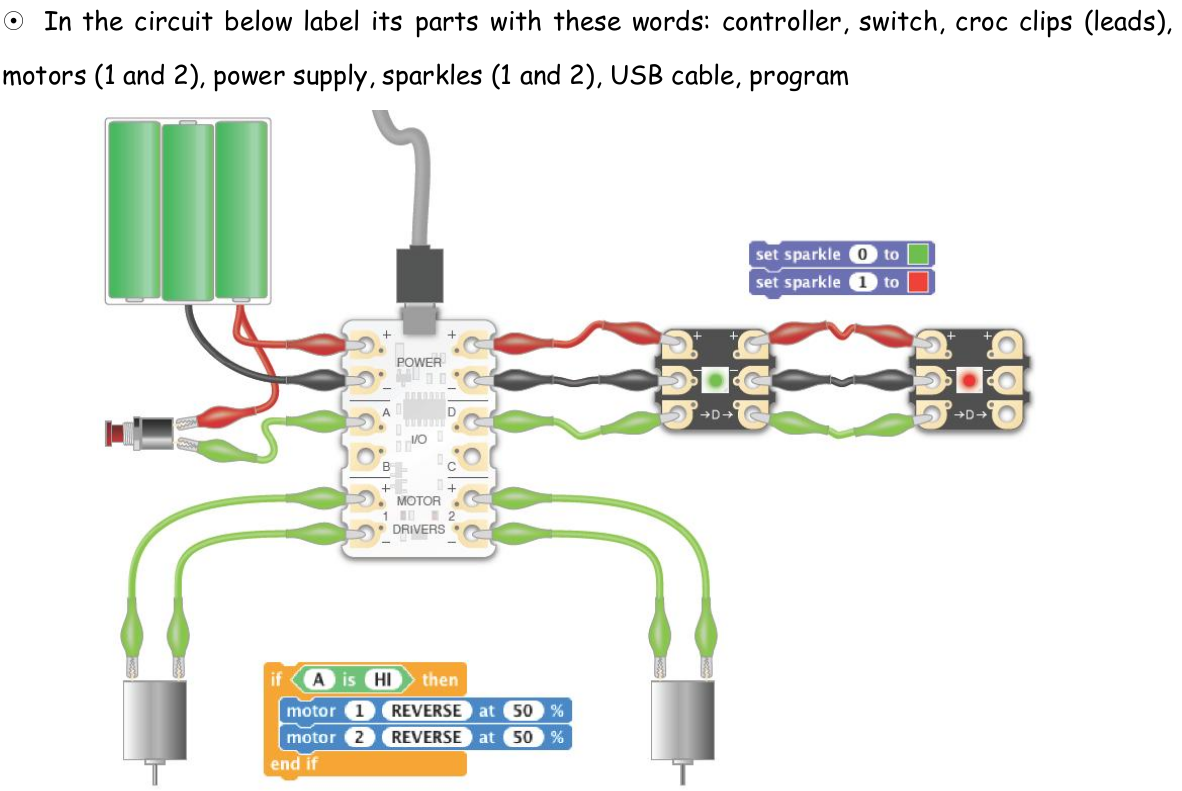
Activity 5: Paper Activity 5
- Have a look at the 2 pictures below (circuits with Crumble microcontroller).
- Download the first picture to Descargas. From the online tool below click on the image icon to upload the picture. Enlarge its size (make it bigger) and place it.
- Indicate the input and output components using the text tool. The type of control is programmed control (the microcontroller is running a program).
- Write your group name and group on the electric circuit. When finished download the picture (Export page as PNG) to Descargas (change its name by microcontroller1.png) . Call the teacher. Finally, upload the picture to your Classroom/unit4_2/Electronic_Circuits.
- Repeat the previous steps with the second picture (microcontroller2.png).

|
|
