
Circuit Diagrams. Have a look at your Workbook (activities 4 and 5).
Activity 1: Electric circuits versus Circuits diagrams.
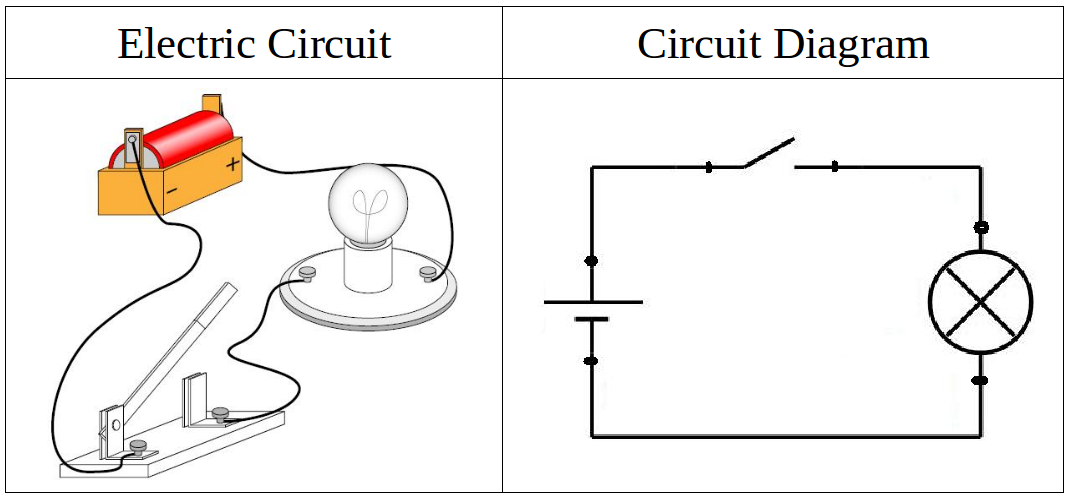
Have a look at the electric circuit below and its circuit diagram. Notice the differences to see how to draw a circuit diagram (with symbols) from the electric circuit.
Have a look at the electric circuit below and its circuit diagram. Notice the differences to see how to draw a circuit diagram (with symbols) from the electric circuit.
Now you are going to draw the circuit diagrams (with symbols) of electric circuits. Follow these instructions:
- Notice the online tool below you will use to draw the circuit diagrams.
- Have a look at the 3 pictures below these instructions.
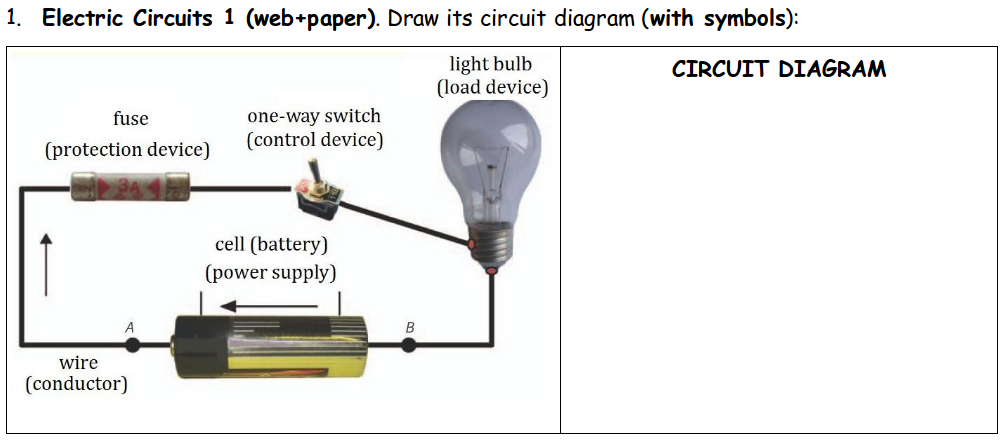
- Circuit01: Download the first picture (Electric Circuits 1) to Descargas. Upload the first picture clicking on the image icon (Upload Media), selected it and enlarge its size (make it bigger).
- After that have a look at the circuit and draw its circuit diagram (with symbols) without the fuse. Use a red pen. Active straight line by clicking the ruler near the pen (toggle straight line)
- Write your name, surname and group on the light-bulb (not on the circuit diagram).
- When finished download the picture clicking on the arrow icon (Export board as png image) to Descargas. Then change its name by circuit1.png) . Call the teacher. Finally, upload the picture to your Classroom/unit4_1/Circuits.
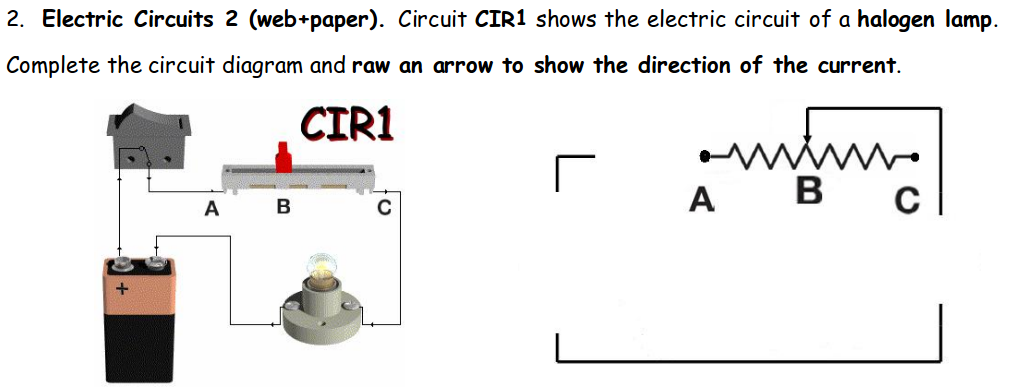
- Circuit02: Now download the second picture (Electric Circuits 2) to Descargas (change its name by circuit2.png) and repeat the previous process (notice the potentiometer).
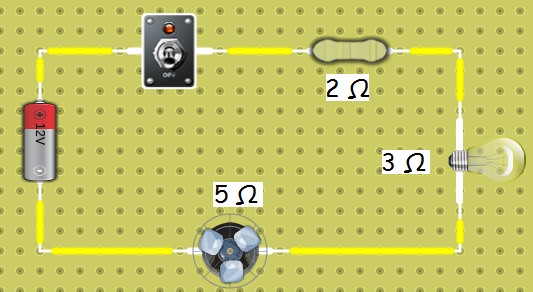
- Circuit03: Have a look at the third circuit and draw its circuit diagram. Notice there is a 5Ω fan (a motor). Download the circuit diagram to Descargas (change its name by circuit3.png) and repeat the previous process.
- Remember this activity has 3 circuits diagrams you have to upload to your Classroom/unit4_1/Circuits.
|
|
|

Electric circuits 1: Series, Parallel and Compound Circuits. Have a look at your Workbook (activity 9).
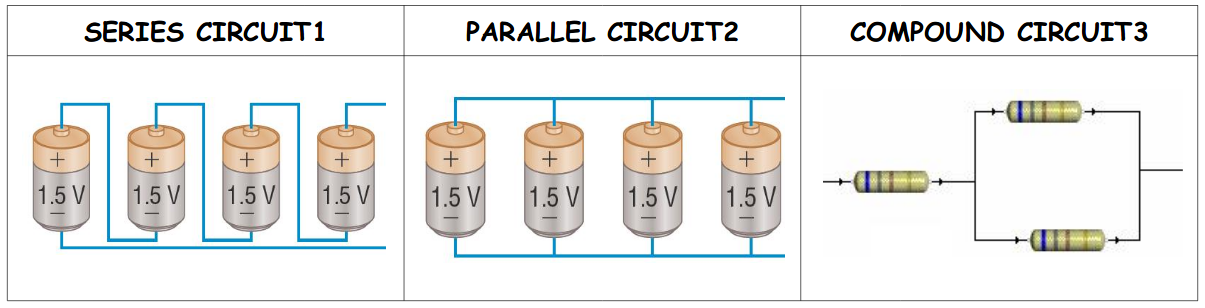
Activity 2. Have a look at the 3 pictures below and try to understand how to connect components in series, parallel and compound circuits.
Now you are going to connect different components in different type of connections. For that use the on-line simulator (PhET) below.
- First, have a look at the picture above (series, parallel and compound circuits).
- This is very important. Click on Lab and place a lamp on the right top of the work area. Select the lamp and change its value (the resistance) at the bottom of the simulator. The new resistance is the number of your user name for Learning Apps. For example, if you are tpr2m_16, the resistance is 16 ohms.
- Then create the following 3 circuits (you can place all the 3 circuits in the same work area)
- a series circuit: 3 batteries. Check the total voltage of the 3 batteries in series is 27.
- a parallel circuit: 3 resistors
- a compound circuit: 3 lamps
- When finished, click on PHTE (at the right bottom of the page), take a screenshot (Circuit Construction Kit_DC screenshot.png), download it to Descargas and then upload it to your Classroom/unit4_1/Paper_Revision.
- Extra. Now download the activity in paper. Go to PDF Bob, upload the activity and then click on Edit tab to upload and paste the 2 pictures you have in Descargas. When finished, export your PDF file and upload it to your Classroom/unit4_1/Extra. Don forget the sticky note, name and surnames...

Electric circuits 2: Series, Parallel and Compound Circuits. Have a look at your Workbook (activity 10).
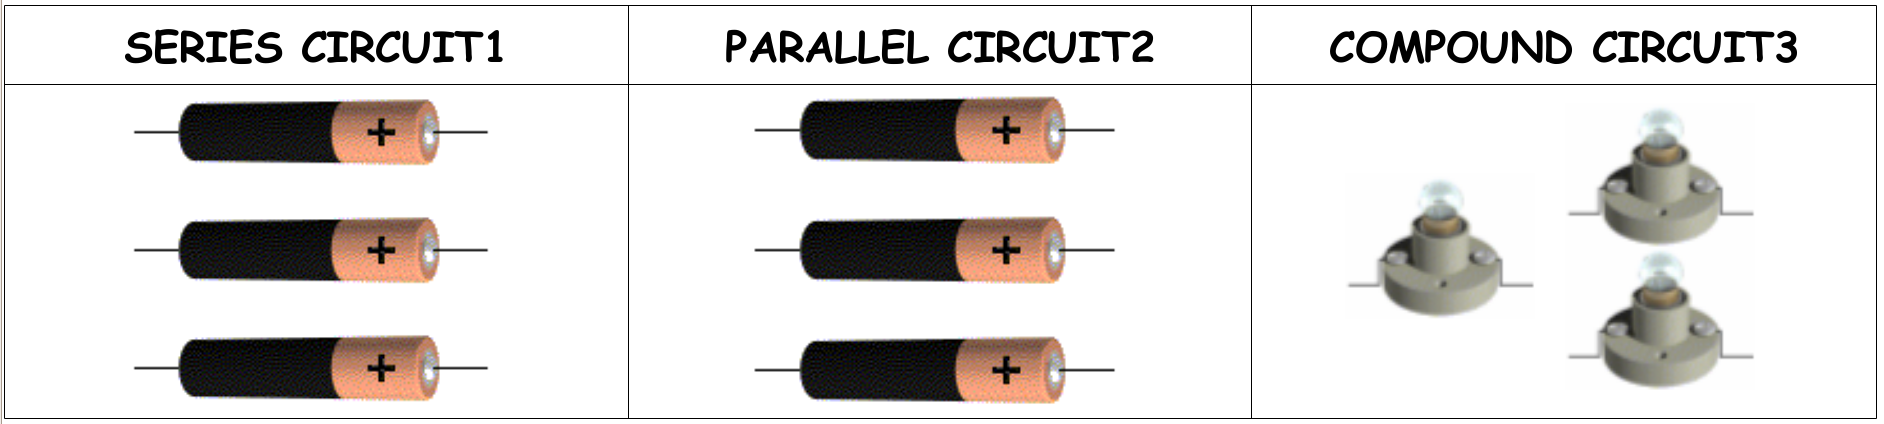
Activity 3. Now you are going to connect batteries and lamps in order to create the 3 circuits above. Follow these instructions:
- Have a look at the picture above (3 circuits but just 1 picture).
- Download the picture to Descargas and then upload it by clicking on the image icon. Enlarge its size (make it bigger) and place it.
- After that connect the batteries and lamps using a straight line (in red):
- Circuit01: 3 cells (batteries) in series.
- Circuit02: 3 cells (batteries) in parallel.
- Circuit01: 3 lamps (light bulbs) in a compound circuit: 2 in parallel and the other in series with these 2.
- After creating the 3 circuits, call the teacher and write your name, surname and group on the title of the circuits (not in a white part).
- When finished download the picture (Export board as png image) to Descargas (change its name by circuit4.png) and upload it to your Classroom/unit4_1/Circuits. Call the teacher.
